Wednesday, September 28, 2022

How to do a Bloom Pour- #SheleeartBloomTechnique


Haven't done a Bloom for a while. So, I thought I would give it another go to see if I can still get those juicy cute cells that are associated with the Bloom Technique.

I took the Sheleeart course awhile back. I highly recommend if you want to master the blooms technique, to take the course.
Plus, you get the chance to join the private group on Facebook, where many people from around the world help each other and share their experiences. The best part I think in taking the course, is, the valuable tips etc that you gain from so many people.
Here is a link to her website. Well worth doing it. - https://sheleeart.com.au/course-outline/

Below is a my YouTube creation video of my latest Bloom pour on 4 tiles which are great to use as coasters.


I won't go into detail on the ins and outs on the Bloom Technique as I strongly recommend to do the course. They say it is one of the hardest techniques to conquer in fluid art.

But, basically you start with a pillow of paint which your colors float on. You add a cell activator to the colors and blow the activator across the colors which will then produce the lovely cells.

Really happy how these ones turned out. The four finished tiles below.....


Pillow Paint was British Paints Clean & Protect Walls Interior White Colors used
This Little Piggy (TLP) Lily Pad TLP Groovy TLP Taffy Amsterdam Greenish Blue Amsterdam Primary Magenta Global Metallic Gold Cell Activator was Australian Floetrol and Amsterdam White


I taped the back of the tiles with tape to protect the back from the paint, but, to also protect it from resin, which I will do later for a nice shine finish which will help also with heat resistance so that these tiles can be used for putting your coffee or tea on.


The tile on my spinner ready for the paint to go on....


After the pillow paint , colors and cell activator has been added and blown out. Ready for the spin on the spinner. 


And, the final product after spun. 


So, I can still do Blooms. So happy. Going to try this technique again soon. 

I have already uploaded one of the best of the four to my Redbubble store. Looks good on the products. Some of  them below -


I also turned one of the Blooms into a repeatable pattern which looks really cool on the Redbubble products....


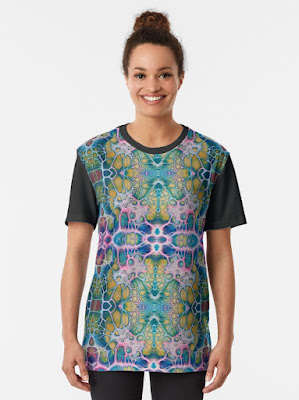
A digitally enhanced image of the pattern with a Mandala embellishment...


And, without a Mandala. 


You can check out all of my designs on the Redbubble products >>here<<


Check out links to my other socials here →     Linktr.ee


It is amazing what a digital app can do for your designs. Takes them to the next level.  I currently use Canva for all my video creations and embellishing my finished art piece to see how it looks before actually painting embellishments onto them. You can check Canva out <here>


AFFILIATE DISCLOSURE: My blog contains affiliate links, which means that if you click on one of the product links, I may receive a small commission if you decide to purchase from any of the products.  


Monday, August 29, 2022

How to Do a Marble Pour - Acrylic Paint Pouring - Fluid Art


I haven't done a Marble Pour before. So, thought I would give it a try. I have been watching quite a few YouTubers doing marble pours and their final paintings look so good.

So, what exactly is a Marble Pour?? Basically, what you do is lay down your paints onto your canvas or whatever you are using any way that you like. You can do puddles of colors, ribbons of colors or just splash the paint around anyway you like.

The next step is to put a marble onto the canvas and while holding the canvas with two hands, tilt it back and forth and round about moving the marble all over the canvas running through the paint.

What you get in the end is a truly interesting painting. Above in the image is the final outcome of my first attempt at a marble pour.

I really like how it turned out.


Colors used in this pour - Mont Marte pre-mixed paints. (These paints are excellent for beginners. No need to mix or measure, just use straight from the bottle) Ultramarine Blue Cerulean Blue Mid Green Dark Green Gold White - for the base Oh, and of course, I used a few marbles as well. 😄


I used a small 4 x 4 inch canvas for this pour. This was just a test pour, so, I thought a small canvas would be suitable. Hope to do it on a much larger canvas at a later date. Once I feel that I have mastered the technique.


I laid the paints down in puddles over top of a white base of paint. As shown in the above image.


Next, pop on a marble and run it through the paint several times.


And, finally above is the finished painting. I love it.

I always have Print on Demand sites on my mind when I produce my artwork. Redbubble is just one of the sites I share my designs on. This above design looks really good on the products. I quite often embellish the final artwork to enhance it. With this one I turned it into a repeatable pattern which also works really well on the products. Image below...


Then of course I added a Mandala image to this too, I really love how it looks.


Below is the quick creation video I did for the marble pour. Not detailed , but, you get the idea of how to do it.


If you want to check out some other videos from other artists on YouTube, check out the links below. They are where I got my inspiration from. BR Turner Art


Below are some of the products with this design on. 


To see the rest of the products with the above design click >here<


To see the rest of the products with the above design click >here<


And, once again as I did in my previous pour, I digitally enhanced the above design in many colors and, with different Mandalas on them.  They all look great and are now also up on my Redbubble Store.  Just a few below.


Some of the products shown below as well. Do you like these?? Let me know in the comments below?


If you want to check out the products using the above Mandalas click on each image above and it will take you directly to the product page on Redbubble.

I am so happy how these turned out. I am really loving Mandalas!


Did another marble pour on a black base.  Not a fan of the dark gloomy colors in this one. But, turned out not too bad. I think I will try a lighter background for my next one. I prefer bright and colorful paintings.

Dried Result


Embellished. 


Looks good on a wall!


The dark and gloomy did not sit well with me, so, my next marble pour was all bright colors. Reminds me of the 1960's. Very psychedelic. Yeah Baby! 


Below is the creation video showing how this one was made.


And, of course it has been uploaded to my Redbubble store and looks really retro on their products. Some of them below.


T-shirt


Coasters


Phone Case


Travel Cup


Zipper Pouch


You can check out all the designs >>here<<


So, I have mastered the Marble Pour. Next up?? Not sure yet. But, watch this blog........


Check out links to my other socials here →     Linktr.ee


It is amazing what a digital app can do for your designs. Takes them to the next level.  I currently use Canva for all my video creations and embellishing my finished art piece to see how it looks before actually painting embellishments onto them. You can check Canva out <here>


AFFILIATE DISCLOSURE: My blog contains affiliate links, which means that if you click on one of the product links, I may receive a small commission if you decide to purchase from any of the products.  


Fluid Art - My Journey